Thank you for explaining both sticking points: the blank workspace and the missing path from “connect an agent” to “it can read my data.” Here is a small expense-tracking project you can follow from the first Base to a reviewed correction. We have now added screenshots of the actual steps, and will keep updating this thread as people point out where they get stuck.
This Busabase launch video shows the overall idea; the hands-on tutorial starts below it:
1. Start with one Base: Expenses
A Base holds your structured records: here, one row is one expense. You can start with this table and add an app interface later.
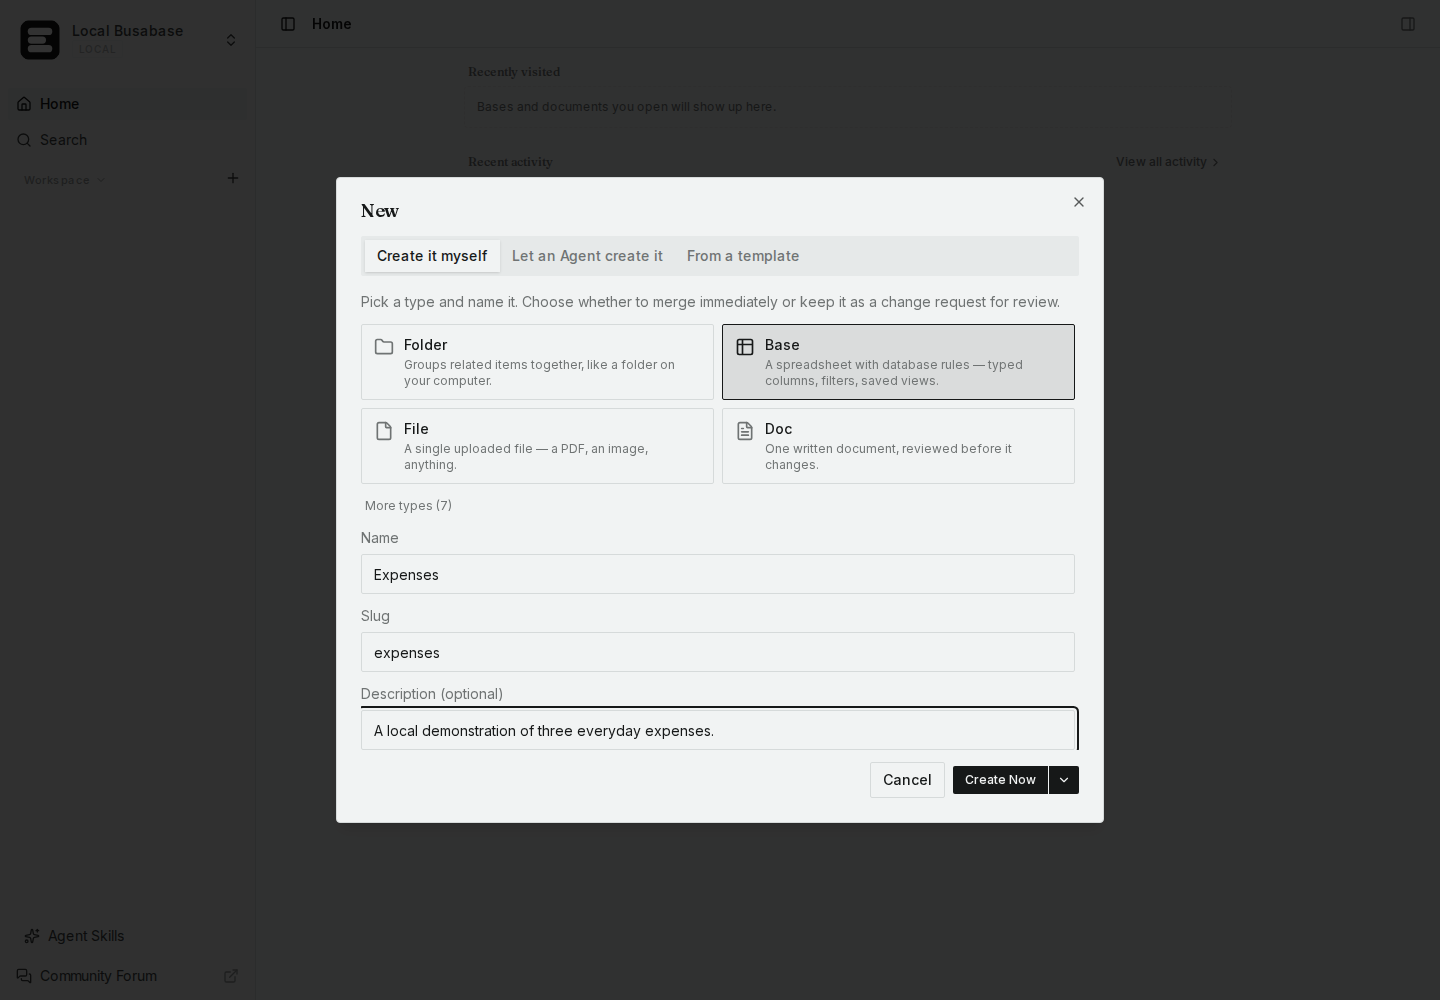
In your workspace, click the + beside Workspace, choose Base, enter Expenses, and create it.
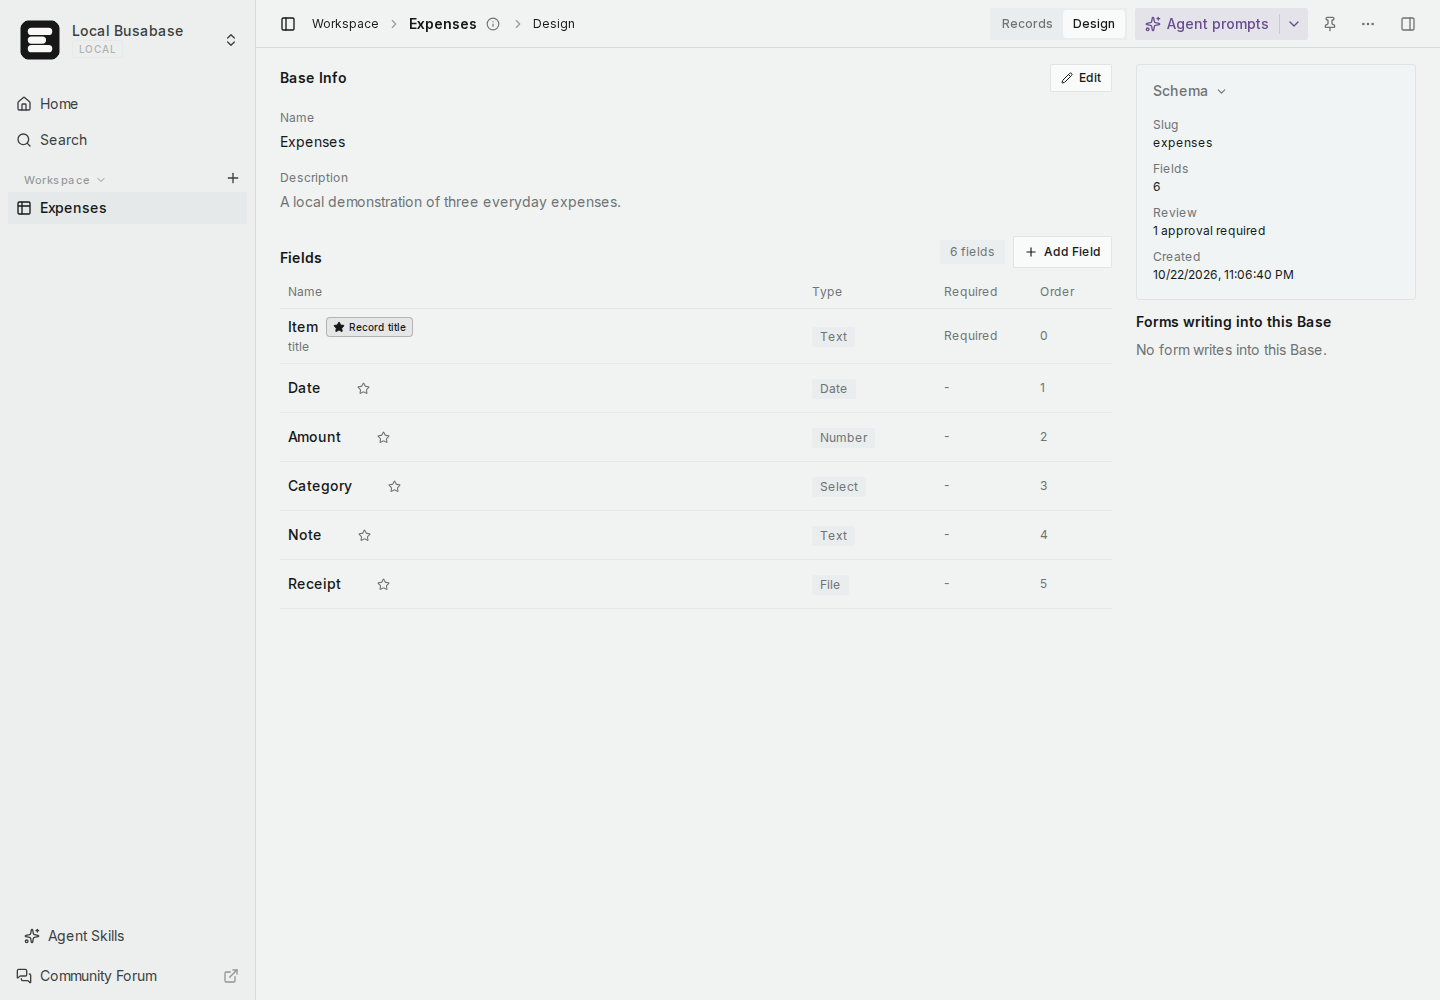
Open Expenses → Design. A new Base already has a Title field. Click its name and rename it Item; keep it as the first, required text field. Use Add Field to add the remaining five fields:
- Item — Text: rename the existing Title field.
- Date — Date: leave Include time off for this example.
- Amount — Number: use one currency throughout.
- Category — Select: add Food, Transport, Bills, Other as choices.
- Note — Text: an optional description.
- Receipt — File: an optional receipt attachment.
All screenshots below are from an isolated local demo with fictional expenses. The “Now” buttons shown here write immediately with the demo owner's permission. If your workspace offers a review request instead, have it merged before continuing. Use the setup prompt from your own workspace; the localhost address visible in our screenshots belongs to this demo.
The Bases guide explains fields, records and views.
2. Add three expenses and make a useful view
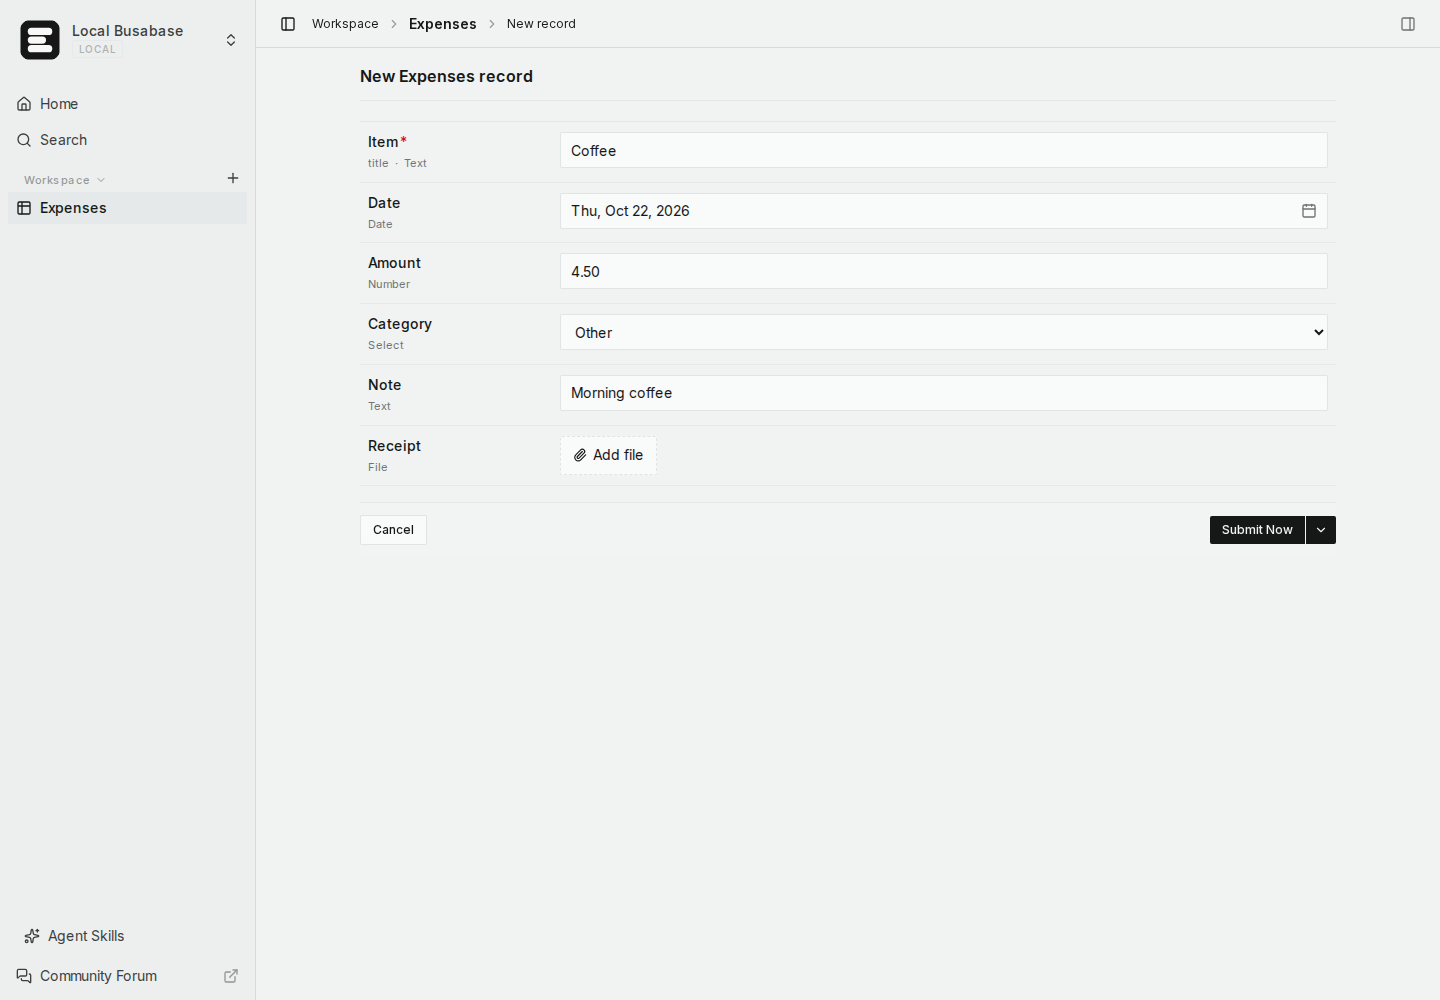
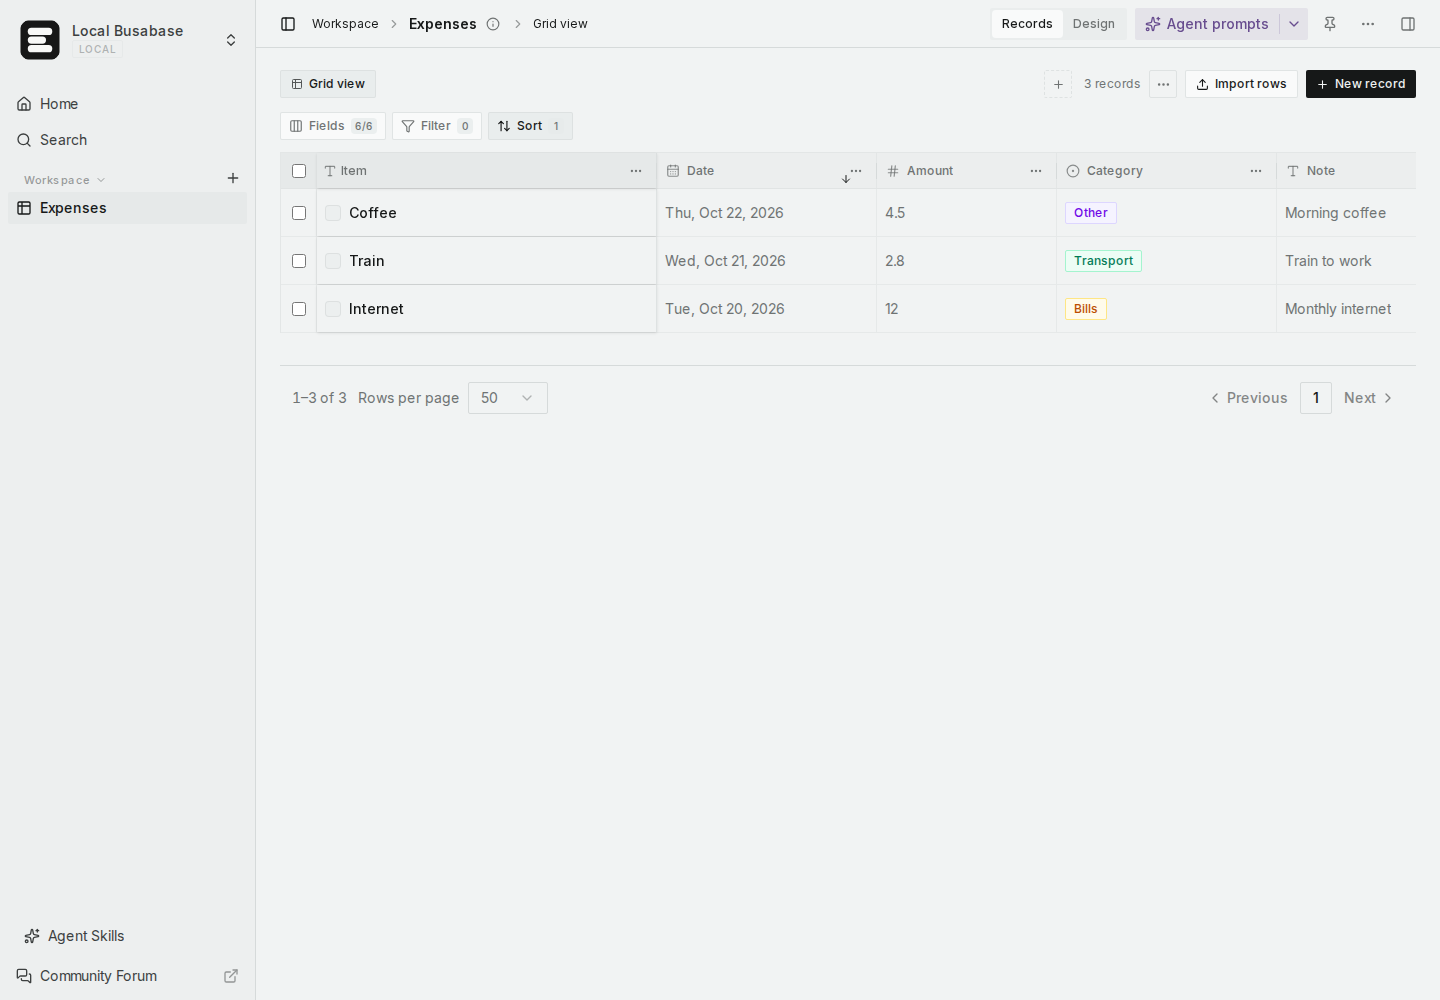
Switch to Records → New record. Fill in Coffee as shown below; leave Receipt empty for now. Save it, then add Train and Internet in the same way.
Use dates in your current month. Our demo uses these three rows:
- Coffee: October 22, 2026; Amount 4.50; Category Other.
- Train: October 21, 2026; Amount 2.80; Category Transport.
- Internet: October 20, 2026; Amount 12.00; Category Bills.
We deliberately leave Coffee in Other so the agent has one small correction to propose later.
Click Sort → Add sort, select Date and Sort descending, then save the view with Update View Now (or submit the view change for review, depending on your permissions).
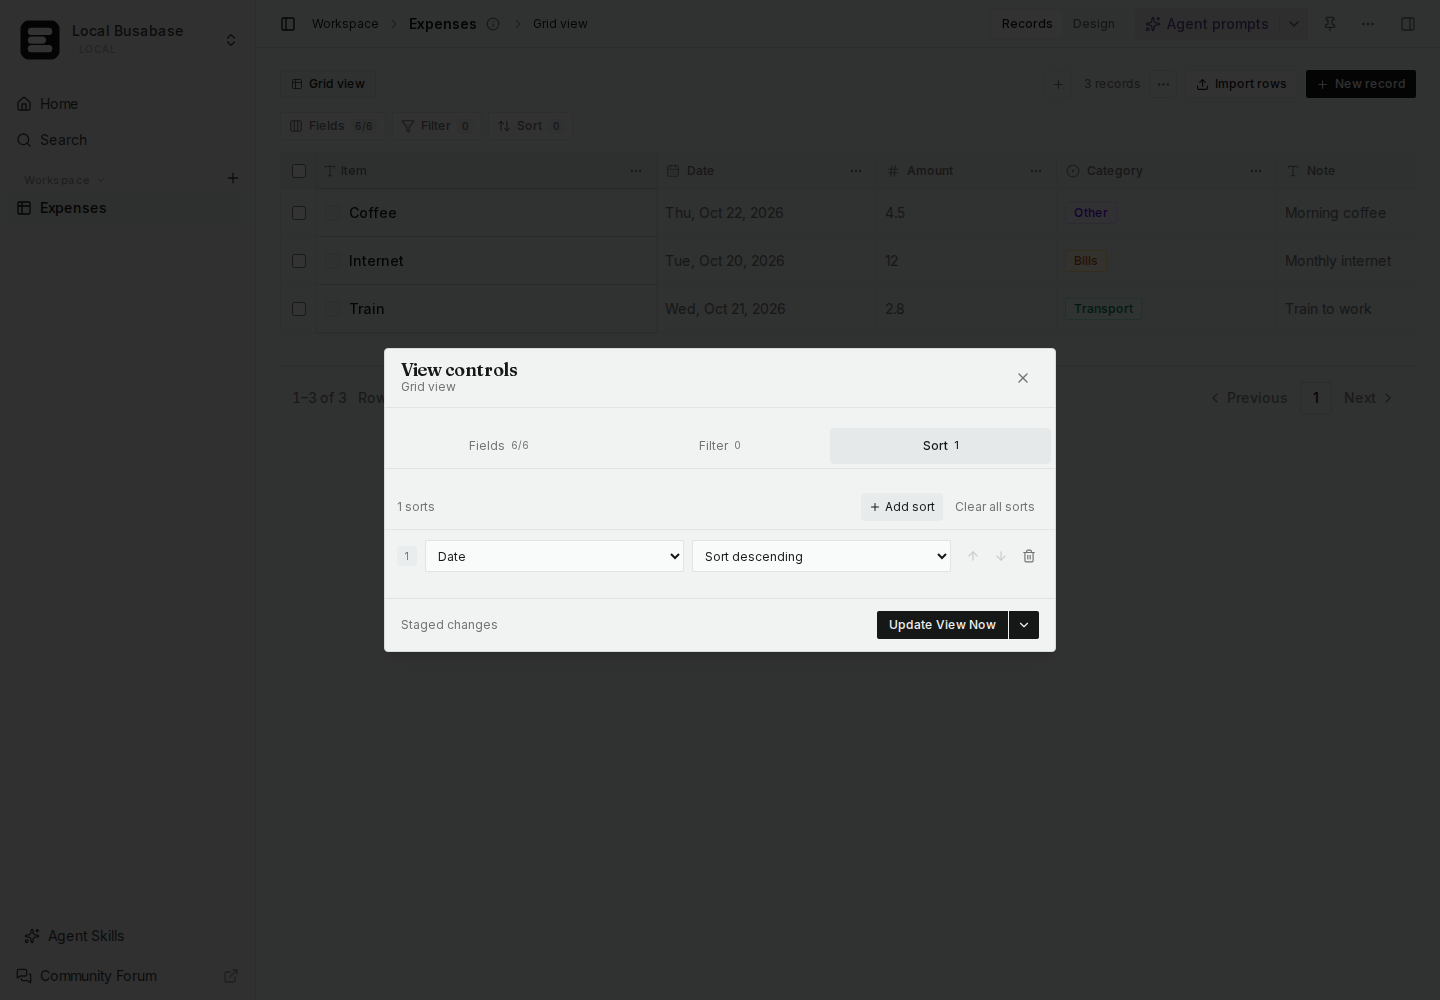
Your starting point should now contain three records, newest first. Their amounts add up to 19.30.
You can also explore populated workspaces in the Template Center. This expense tracker is the example we are building in this thread.
3. Connect your agent, then ask it to read the table
Open Agent Skills at the bottom of the workspace sidebar. Choose the appropriate client path, click Copy prompt, and paste it into the agent you use. Let the agent follow that workspace's onboarding instructions; complete any sign-in or permission confirmation it asks you for. The agent setup guide covers Cloud/Desktop and the supported connection paths.
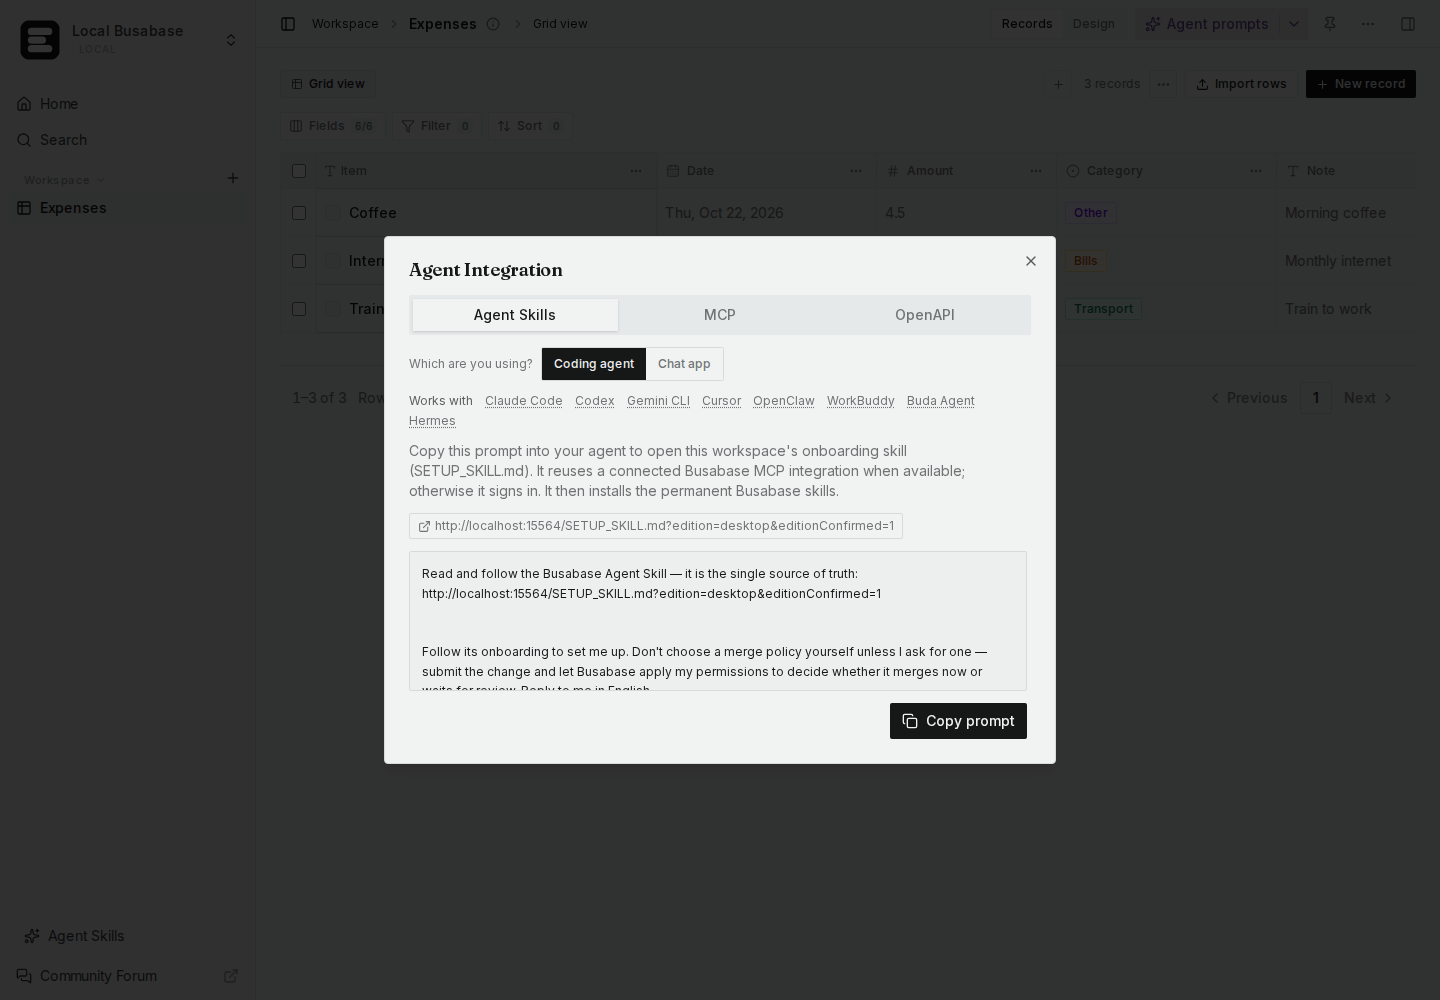
There is also a useful shortcut once you are looking at the right Base: click Agent prompts at the top of Expenses, choose Find the records I mean, and click Copy. The copied prompt already identifies this Base and includes the connection instructions if they are needed. Paste it into your external agent, then add your own request below it.
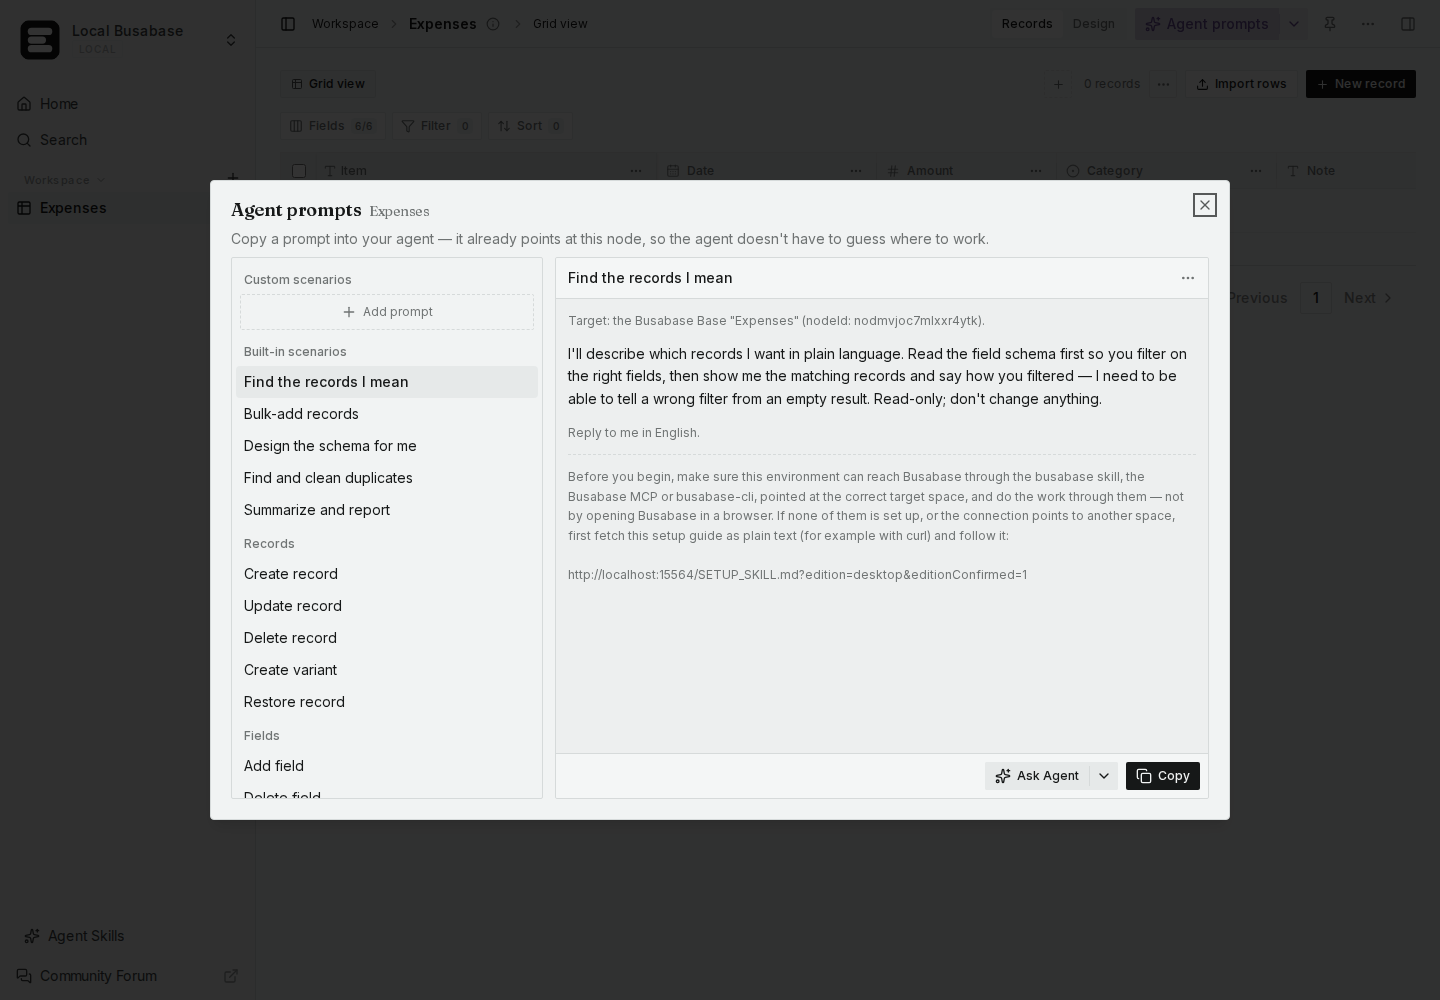
For this first check, append:
Verify which Busabase Space you are connected to. Find the Expenses Base, list its six fields, and read only the three sample rows: Coffee, Train, and Internet. Show their amounts and categories, and calculate their total. Do not change anything yet. If you cannot access this Space, stop and explain what connection or permission is missing.
Compare the answer with your table. It should list all six fields and the same three expenses, totaling 19.30, with Coffee still in Other. If the Space or data is wrong, fix the connection before asking for changes. Busabase connects to the agent you already use; this step does not require a built-in chat model.
4. Ask for one proposed change
A Change Request is a proposed set of changes you can inspect before it becomes part of the saved data. It shows which record and fields would change, and keeps the review discussion with that proposal.
Give your connected agent this task:
In the existing Expenses Base, propose changing only the Coffee expense's Category from Other to Food because it is a food and drink expense. Keep its amount, date, note, receipt, and all other records unchanged. Submit a Change Request for human review and give me its link. Force a review-only submission with autoMerge: false, even if your credential can write directly. Do not approve or merge it.
That last instruction matters: a credential with direct-write permission can otherwise merge an allowed change immediately. A credential restricted to proposing changes is another way to enforce review.
After submission, Coffee should still say Other in the Base. The proposed Food value belongs to the pending request until it is merged.
5. Review, approve, merge, and check the result
Open Home. Under Waiting for your review, click Update record Coffee. You can also open the review link returned by your agent.
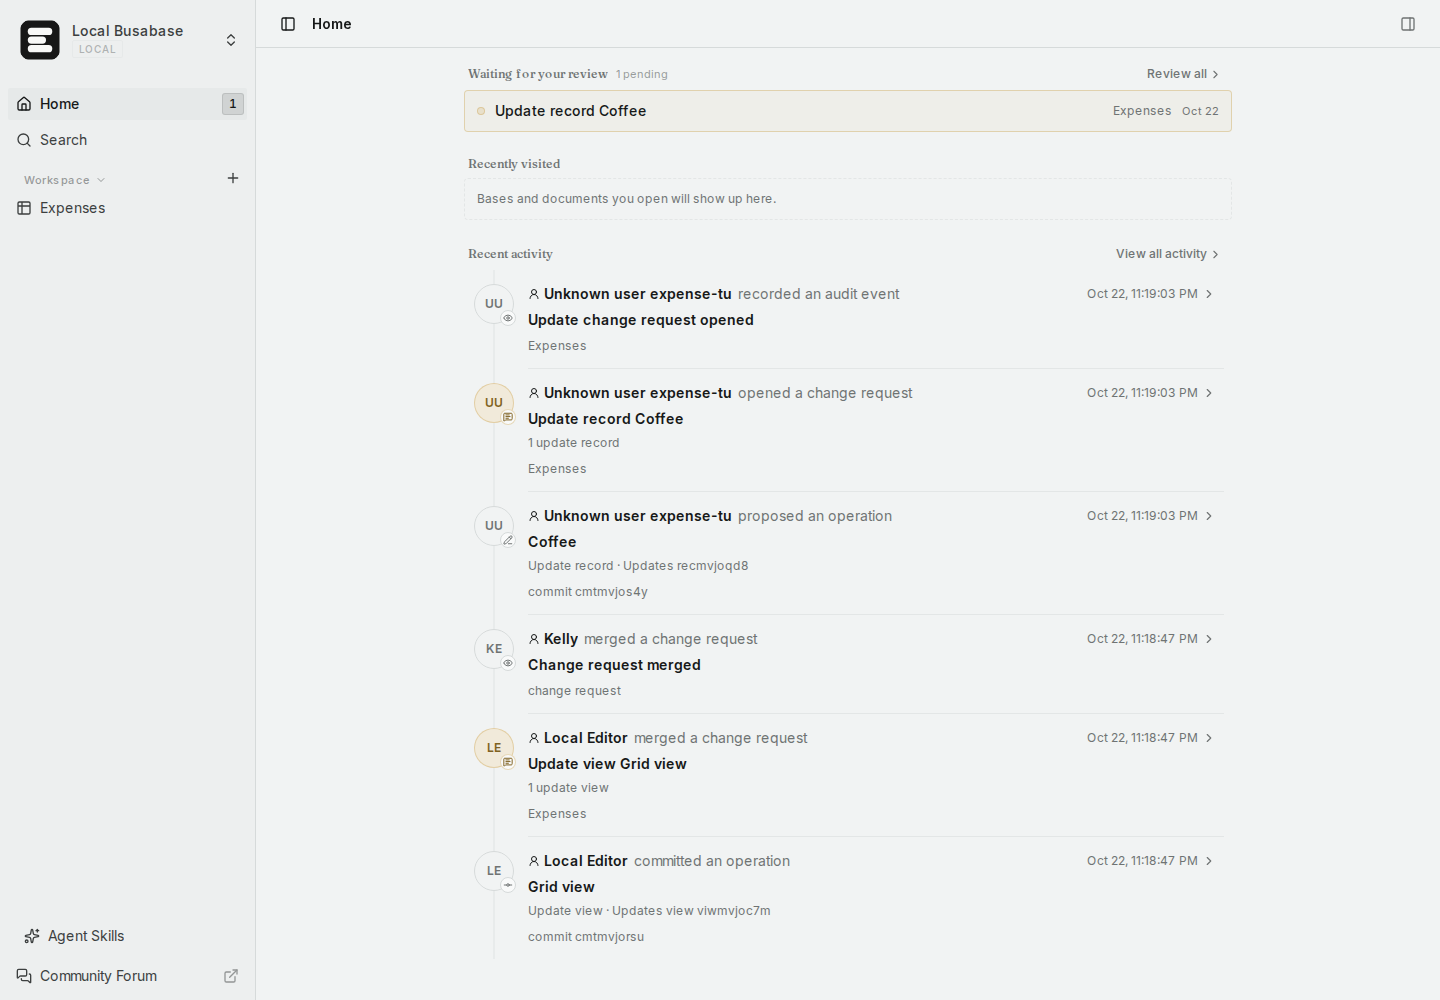
On the review page, check What will change: it should show exactly one record update, Coffee → Category: Other → Food. If it changes the wrong record or includes extra edits, choose Request changes and explain what needs correcting. For this matching proposal, click Approve.
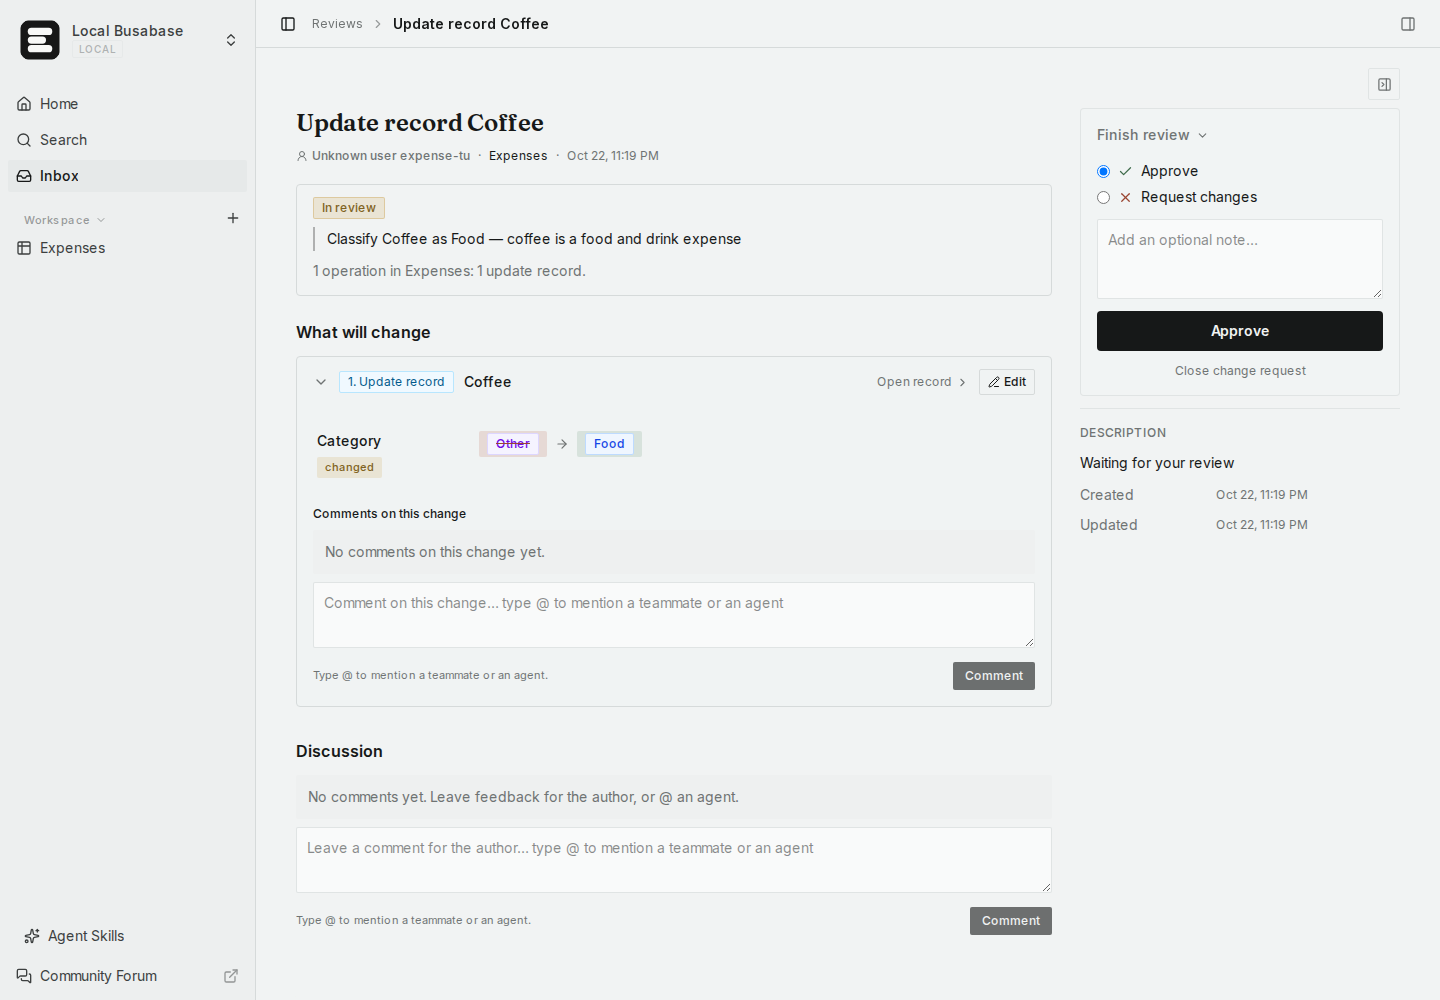
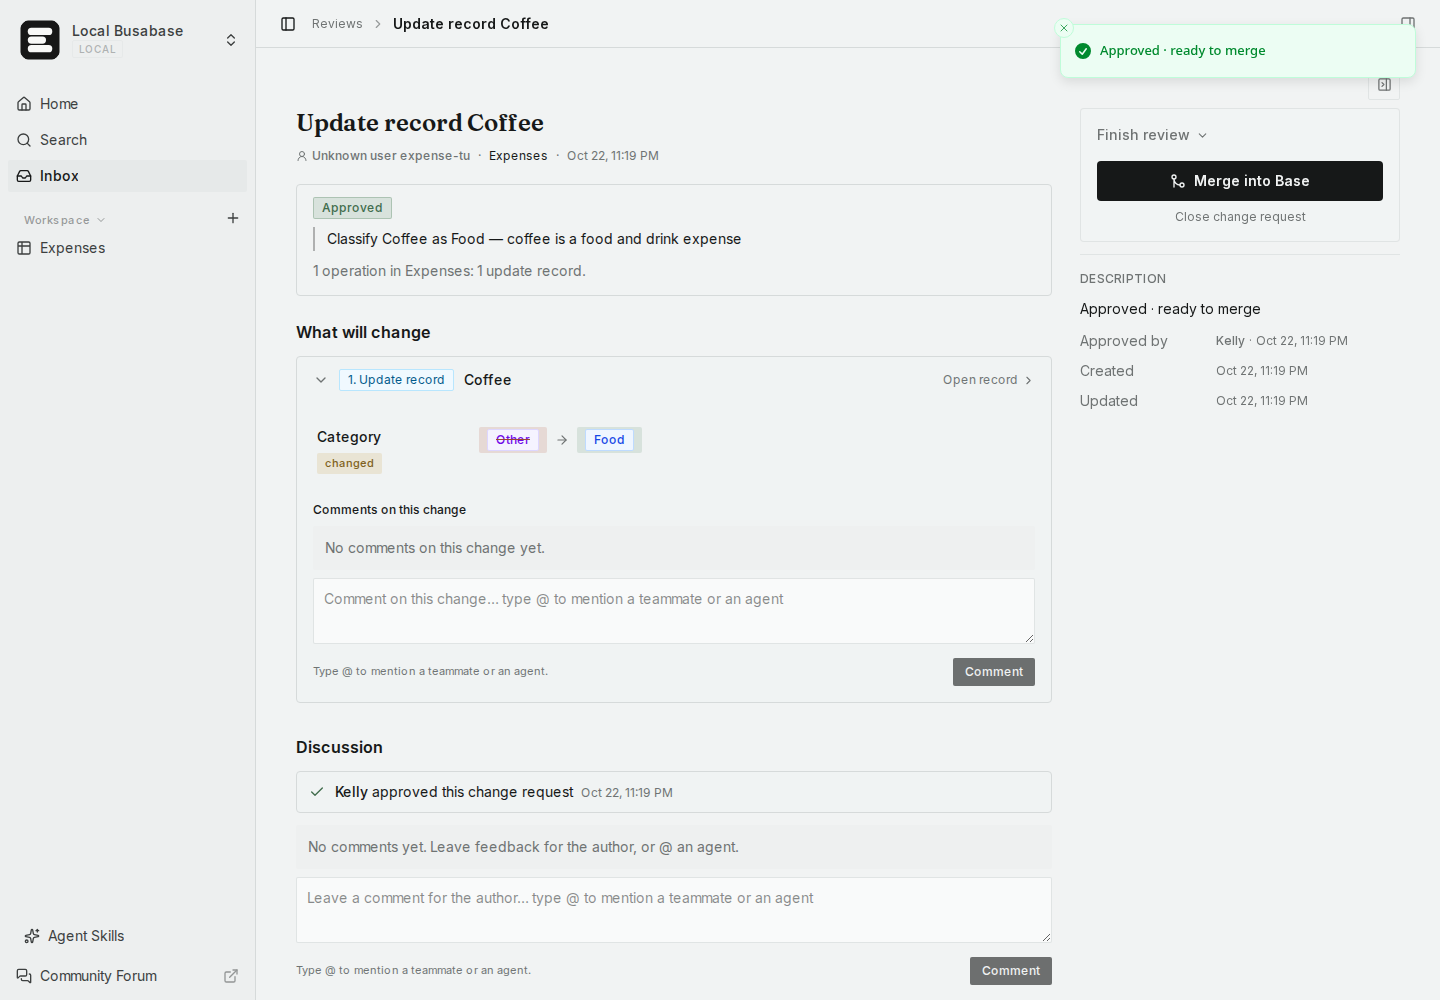
Approval and merging are two separate steps. Approved · ready to merge means the review passed; Coffee still has its old category in the Base. Click Merge into Base to apply the approved change.
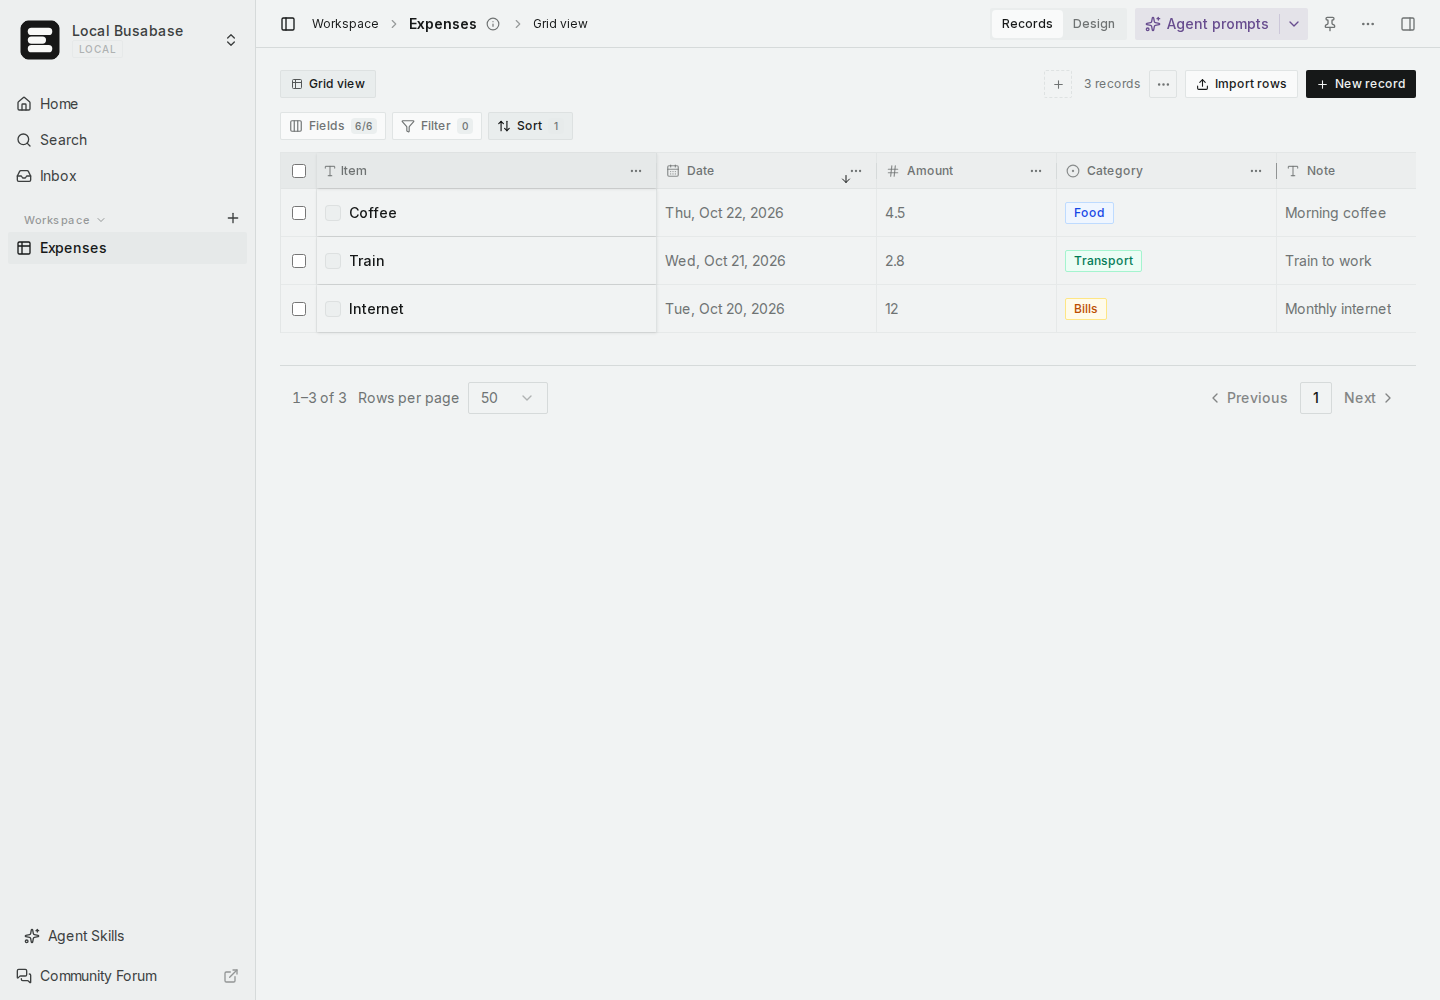
Return to Expenses → Records. Coffee should now say Food; Train and Internet should be unchanged. The total is still 19.30. We ran this sequence in the local demo and read the records back to confirm that only Coffee's category changed.
The Quick Start provides more background on the review flow.
6. Optional next step: add an AirApp interface
The Base now works as a small expense tracker. If you also want a page with totals and category summaries, give the connected agent this brief:
Use the busabase-app-creator skill to build a read-only Expenses AirApp. Read the existing Expenses Base. Show this month's expenses, their total, and totals by Category. Do not alter the Base schema or records. Show me the plan first; wait for my approval before building. Submit the App files for human review without merging them.
After reviewing and merging the app files, compare the app with the Base: for our corrected sample, Food 4.50, Transport 2.80, Bills 12.00; total 19.30. The Build an AirApp guide explains that workflow. This is an optional extension; the screenshots above demonstrate the Base and review workflow.
We will continue updating this tutorial in this thread. If you try it, please tell us the exact step where you get stuck and whether you use Cloud or Desktop, so we can improve that part of the walkthrough.